Configure an Application
Follow the steps below to begin configuring the application you created:
-
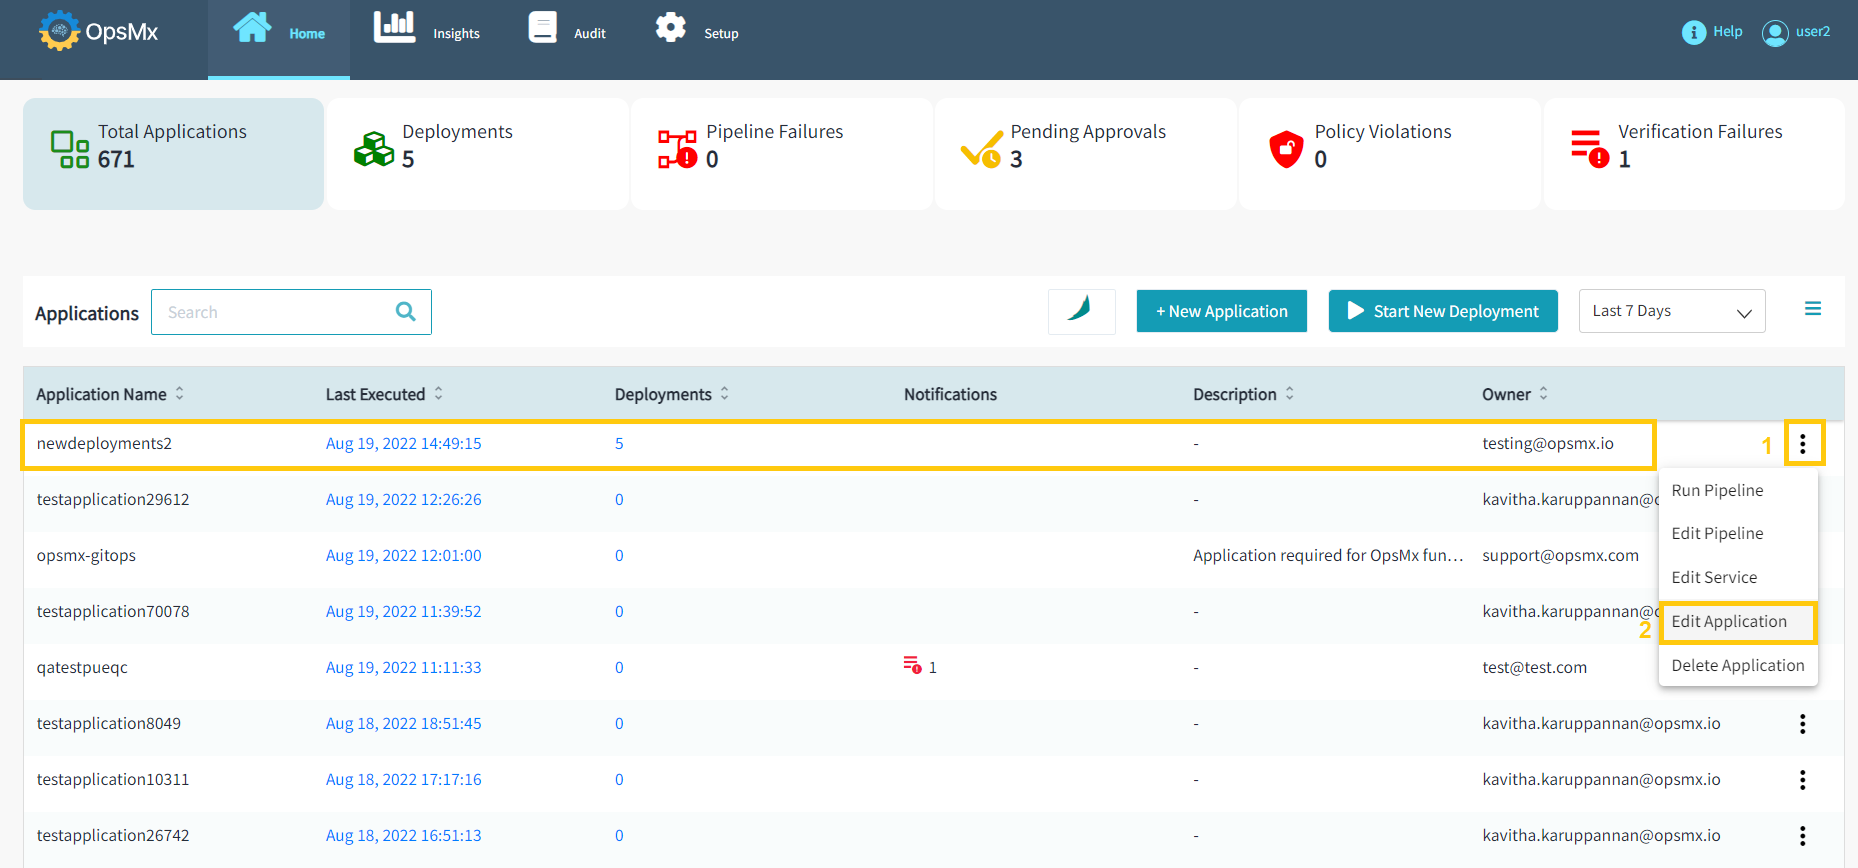
From the Application dashboard, select your application name which you need to edit Click "Three dots" at end of the application name and then select "Edit Application" as shown in the image below.
-
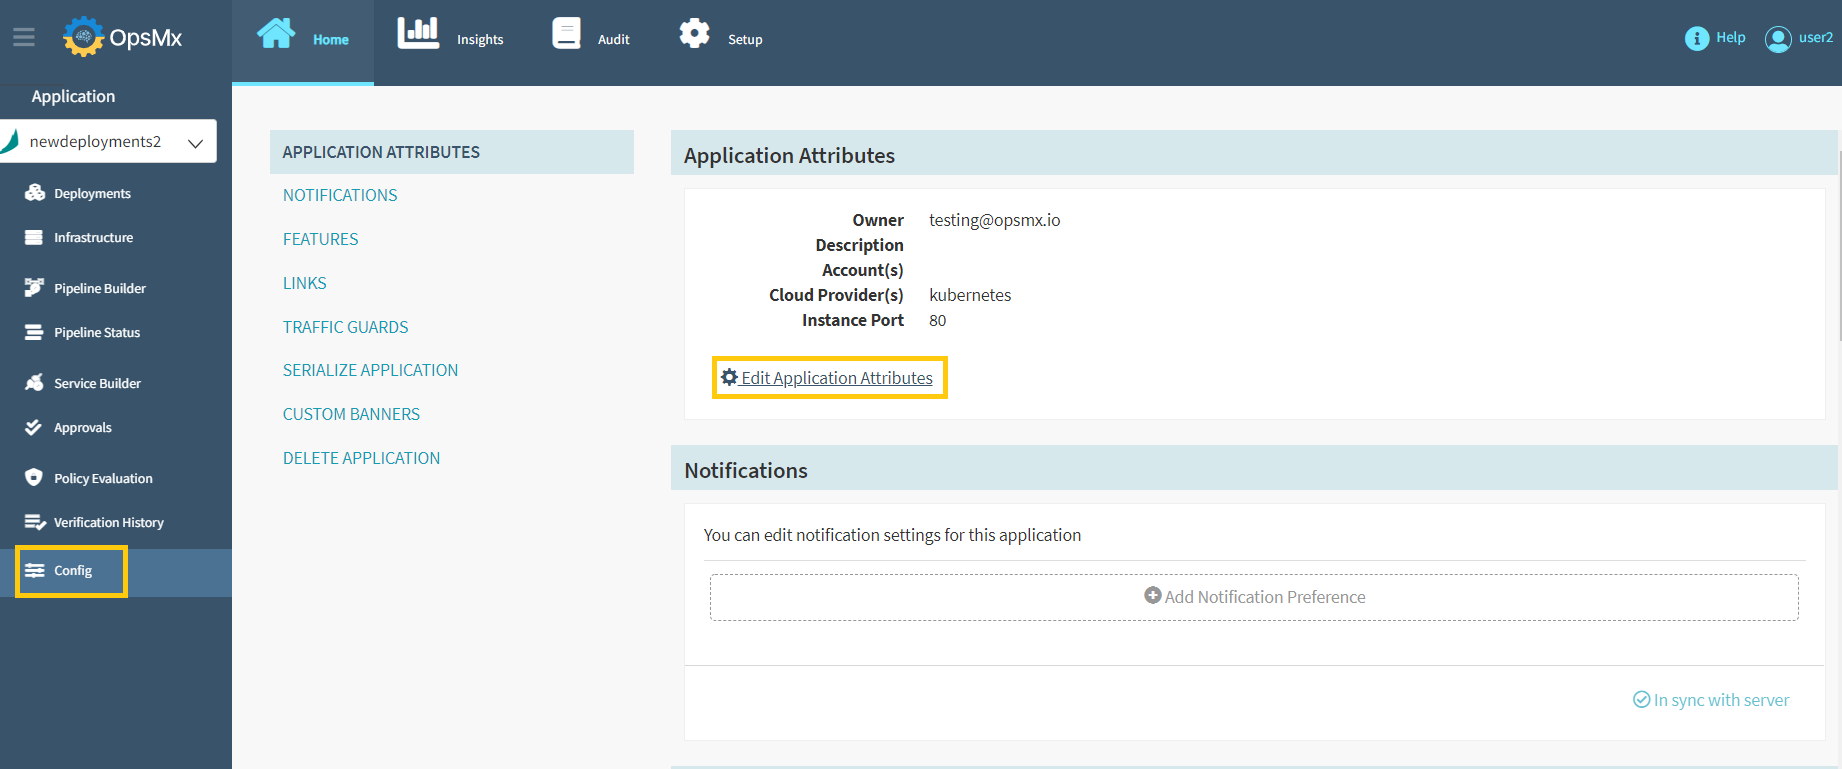
This will take you to the Config page, where you can modify the application's various attributes. Click on the "Edit Application Attributes" to edit the application attributes.
-
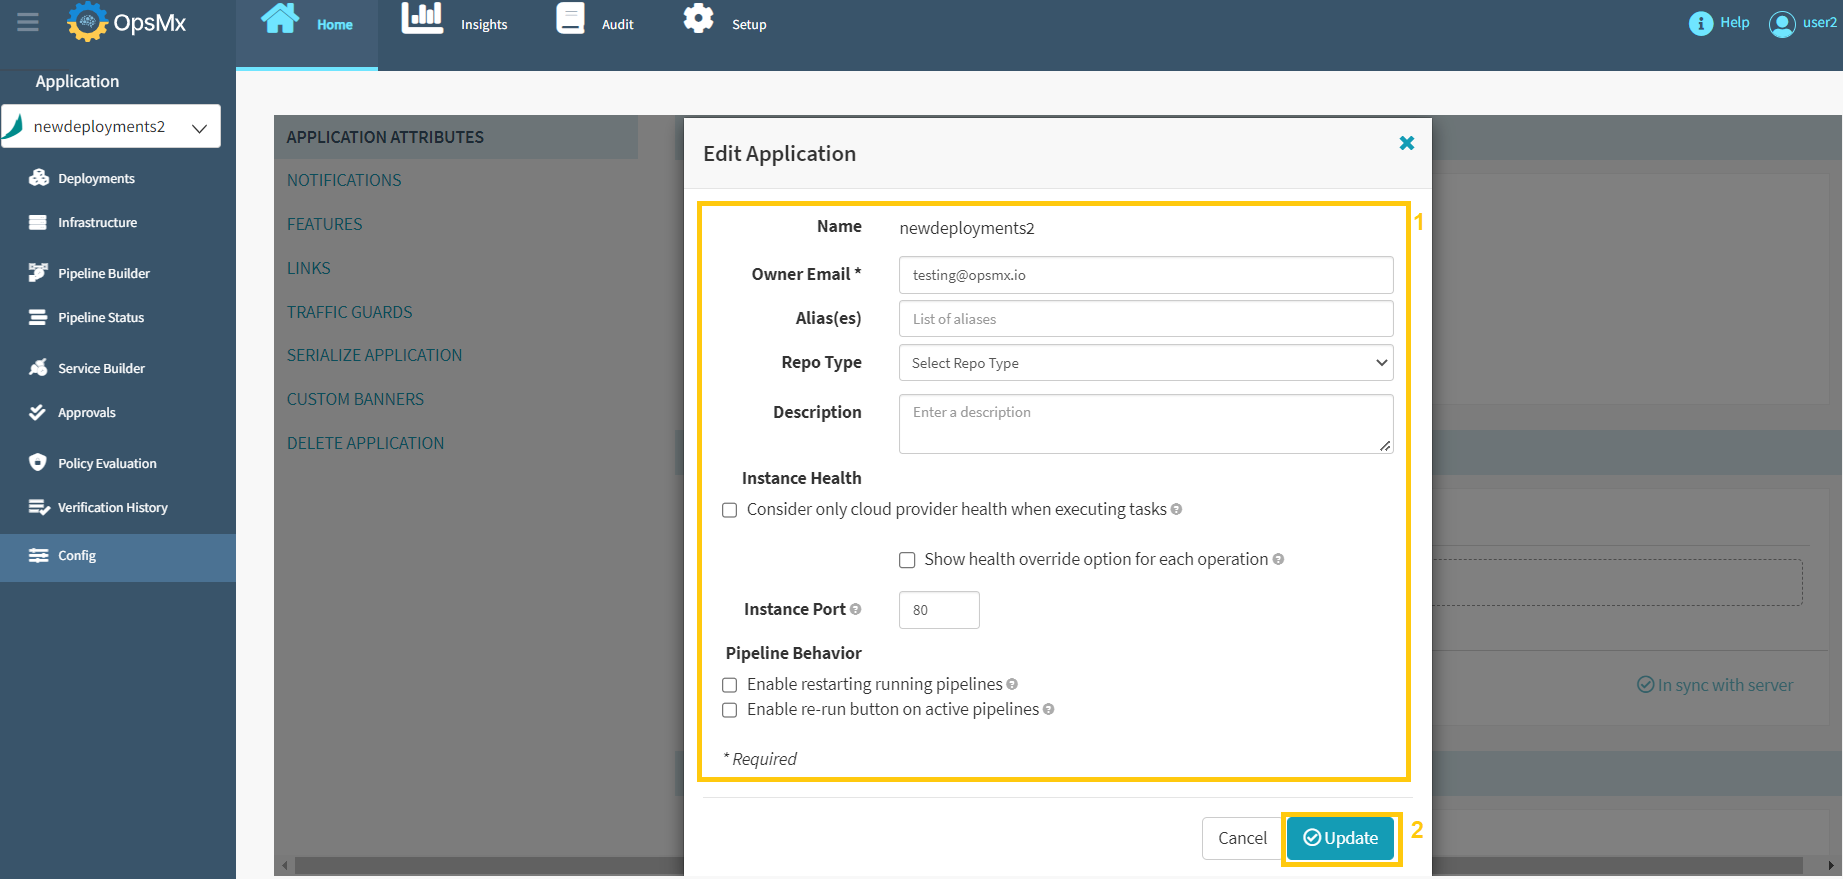
The application attributes that you specified during the creation process will be displayed as shown below. You can make the necessary changes and click "Update".
Editing an application allows you to add various features to Spinnaker like
-
Configuring Notifications
-
Enable or disable certain features
-
Create a traffic guard
-
Delete the application entirely.
-
Create Pipeline Notifications
You can send notifications after the pipeline activities are completed. Follow the steps outlined below to do so:
-
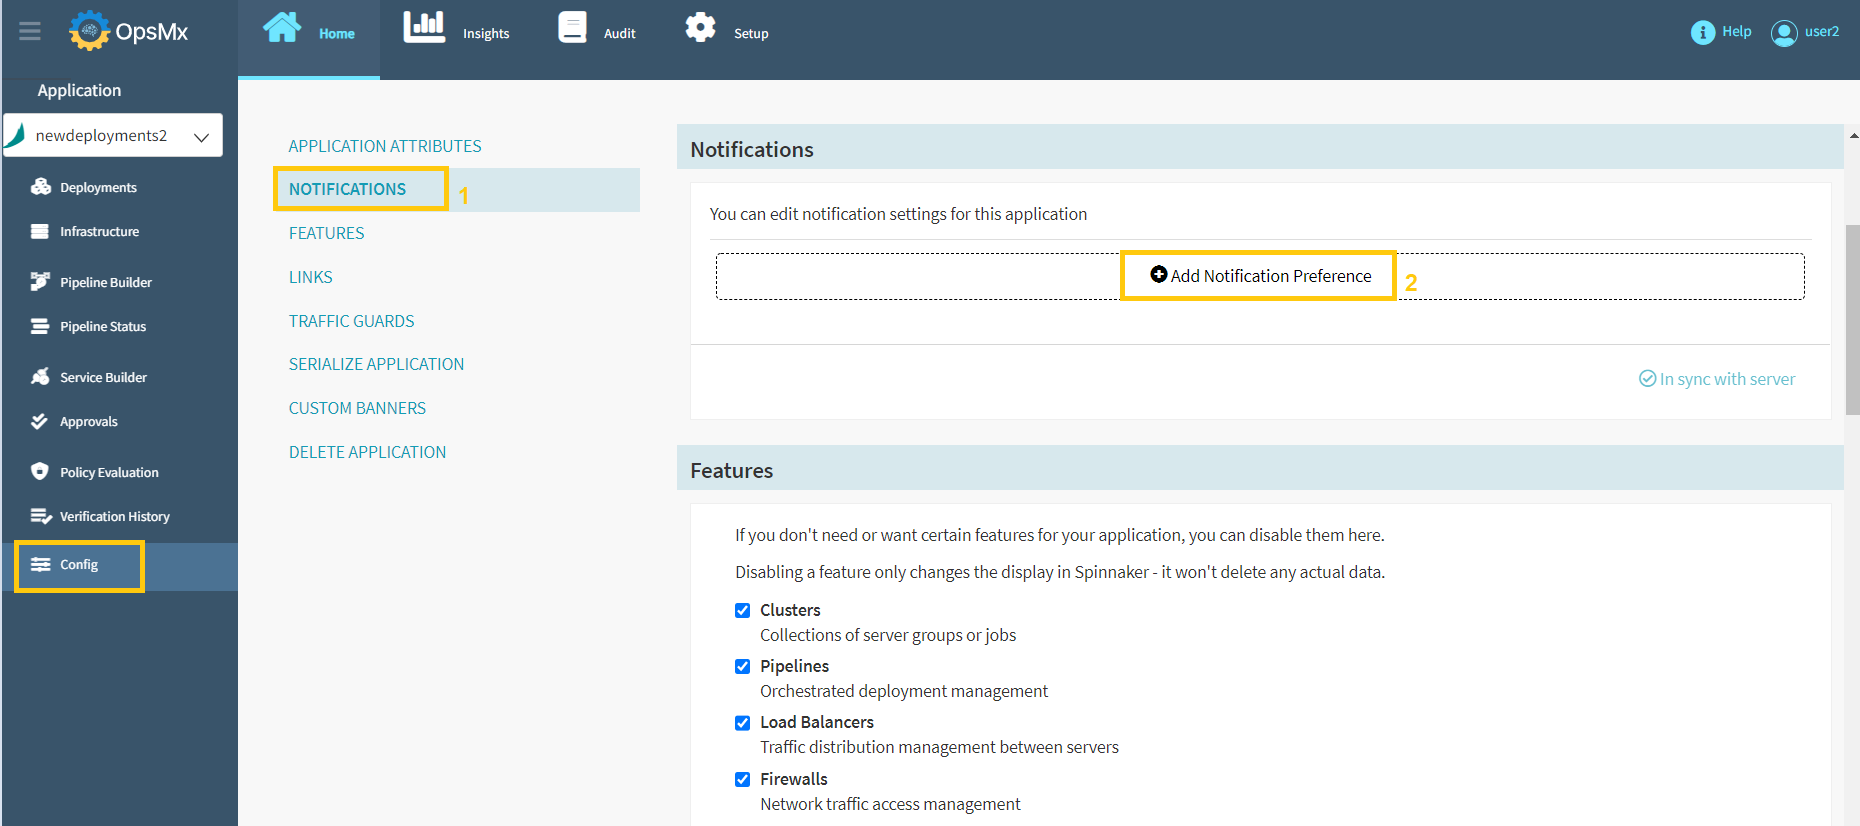
From the Config page, Click "Notifications" and then click "Add Notification Preference" to create pipeline notifications.
-
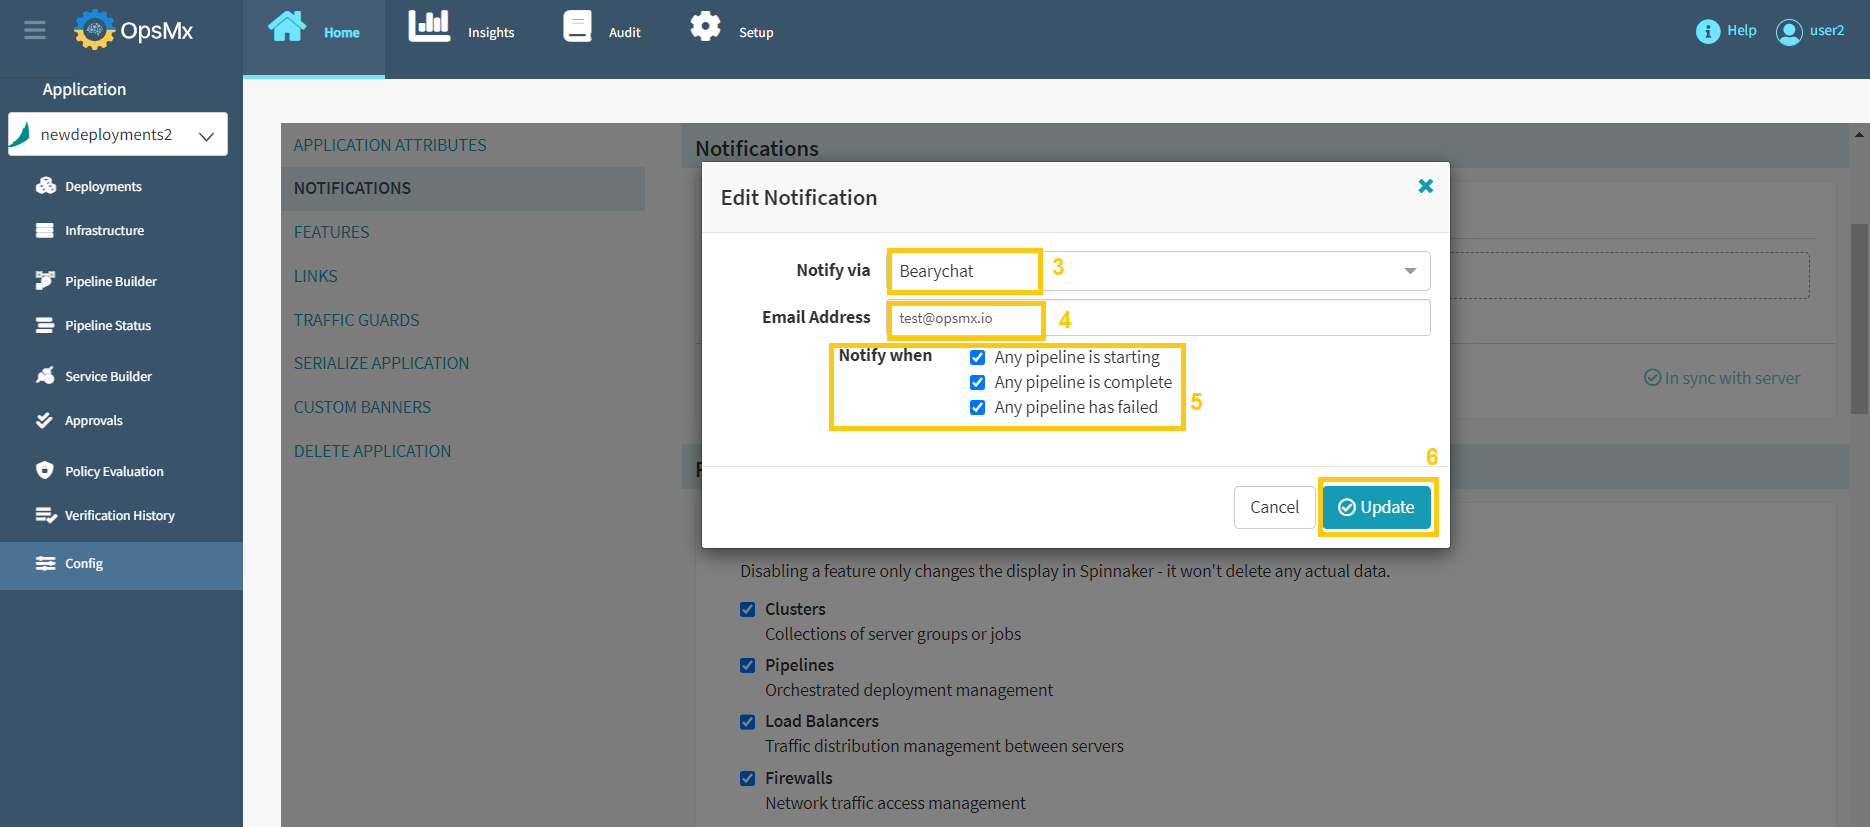
Edit Notification pop-up window will appear, allowing you to update the necessary columns as described in the following steps.
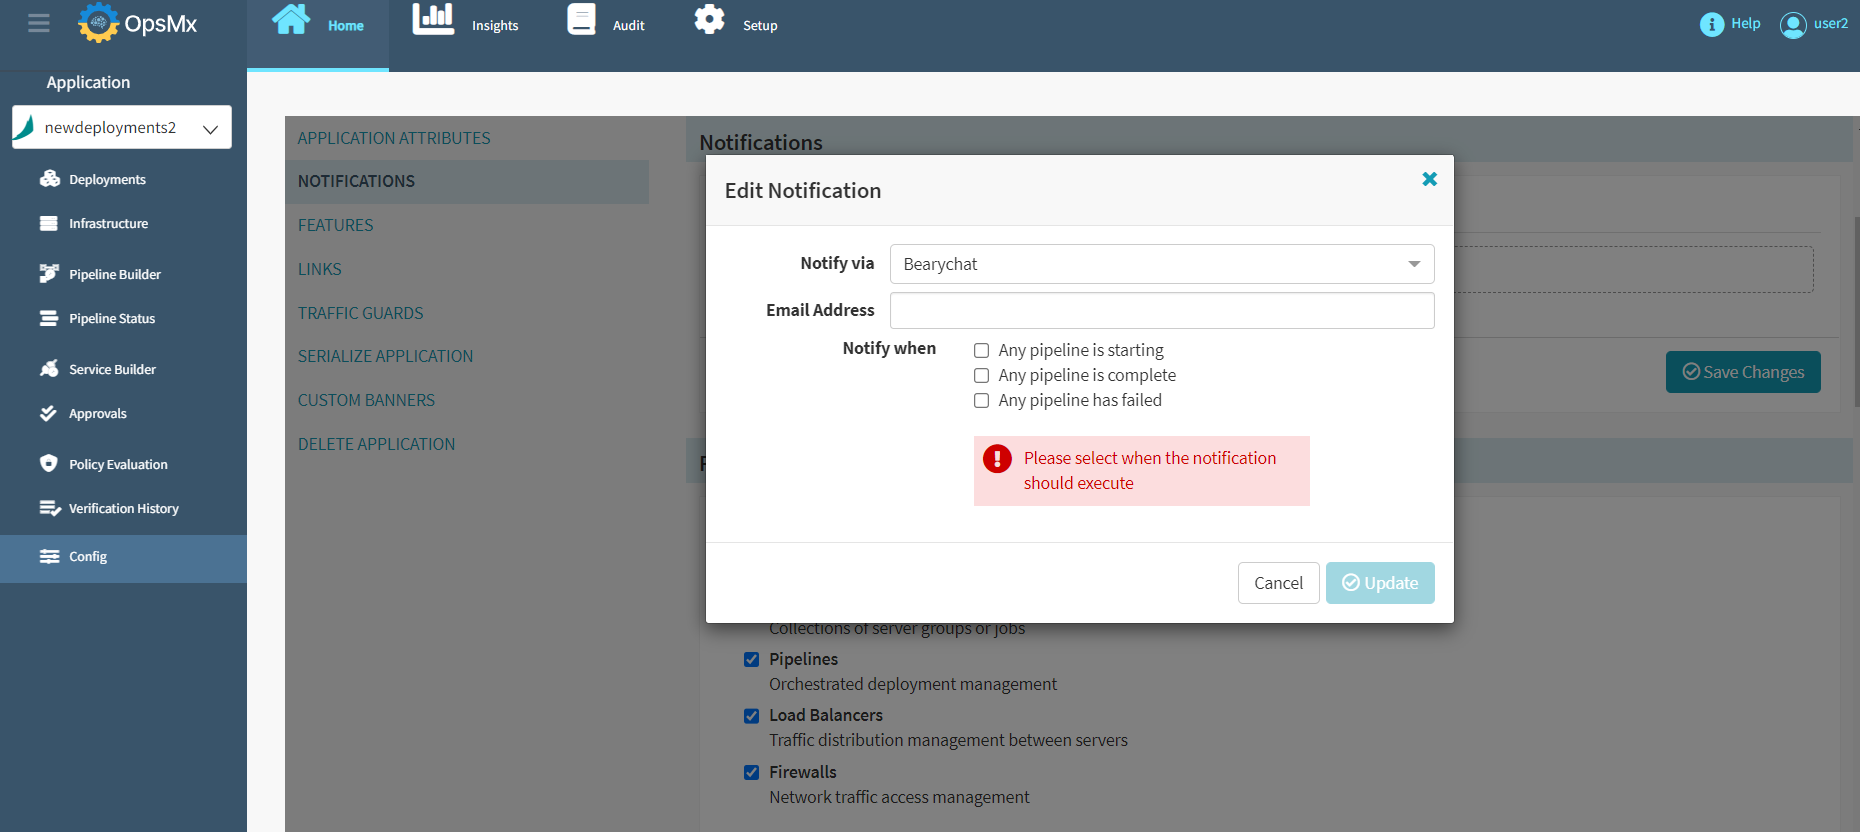
Follow the sequence as shown in the image below for steps 3 to 6.
-
Select a notification method from the "Notify via" drop-down box and the options are
-
Bearychat
-
Email
-
GoogleChat
-
Pubsub
-
Slack
-
-
Provide the following information based on the selected notification type:
-
Email address
-
Chat/Team webhook URL
-
Publisher name
-
-
Select the pipeline event that will trigger this notification:
-
When a pipeline started
-
When a pipeline finished
-
When a pipeline failed
-
-
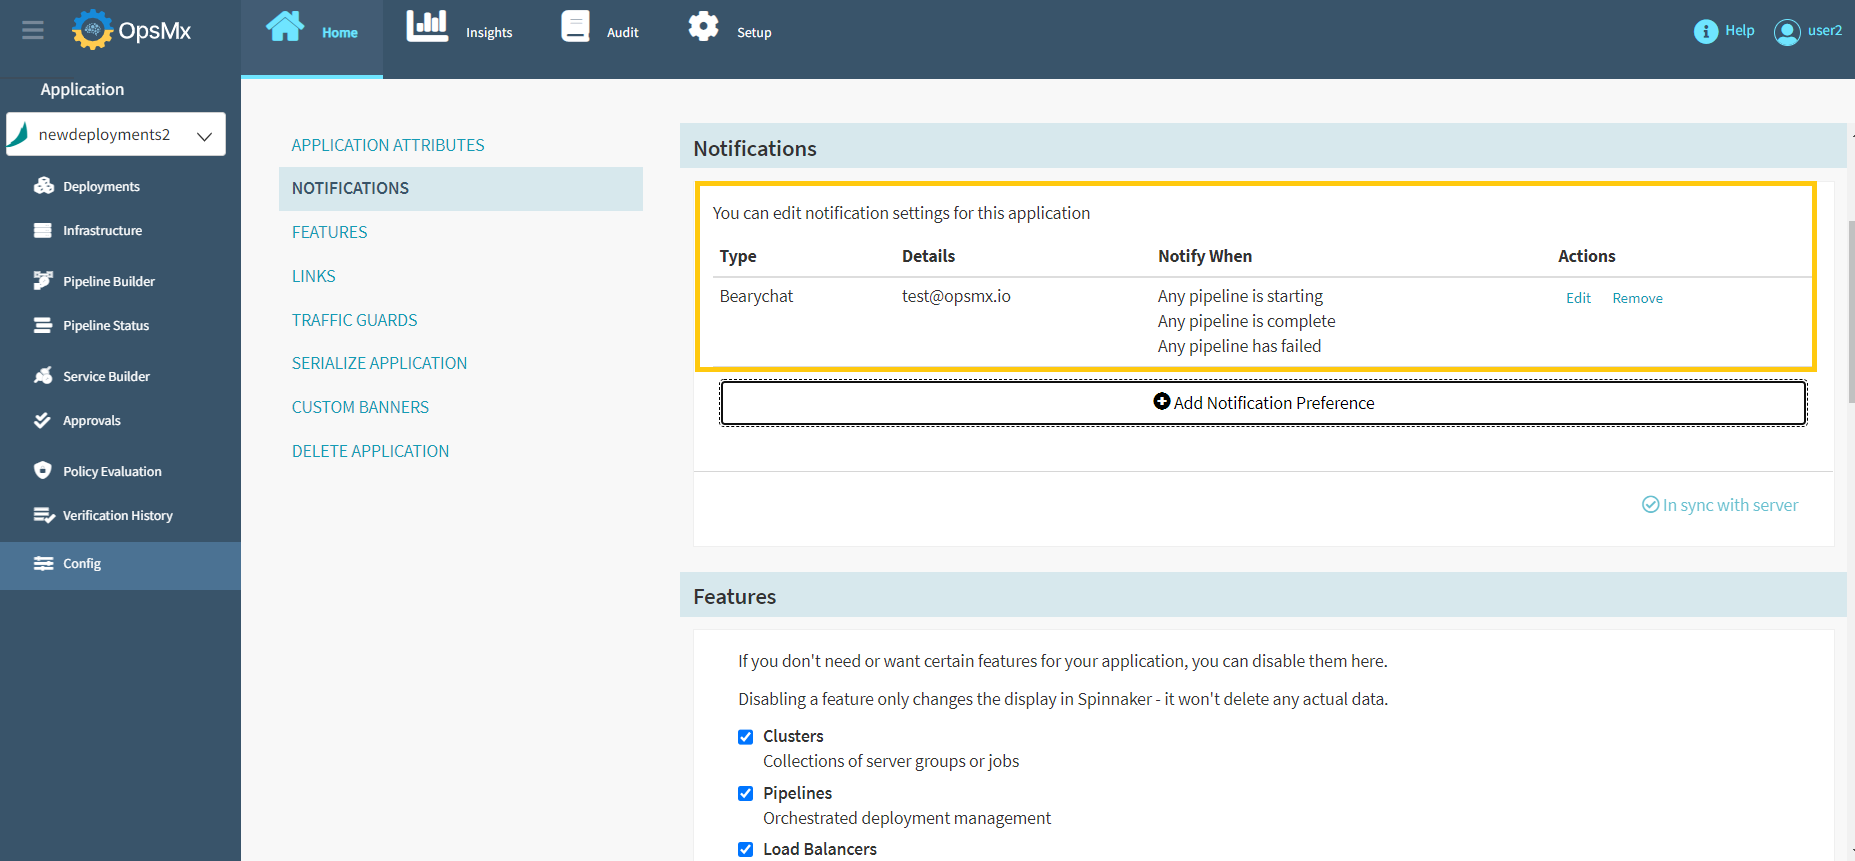
Click Update and the newly added Pipeline Notifications appear as shown below:
-
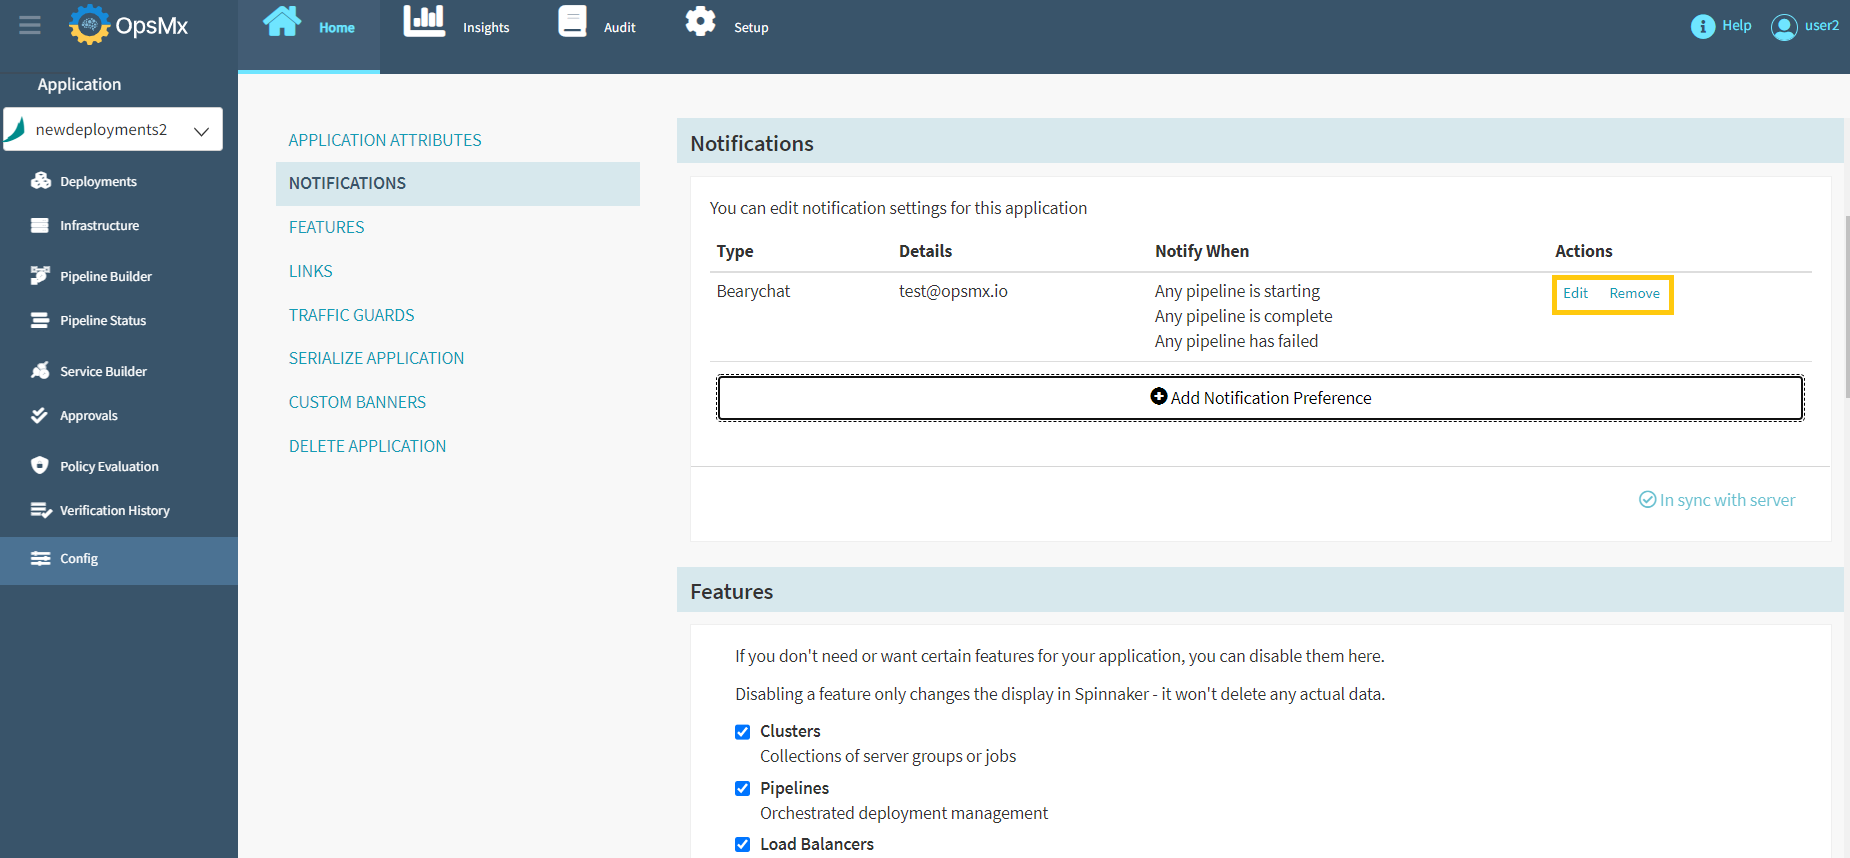
Users can edit or remove the pipeline notifications by clicking the "Edit/Remove" options.
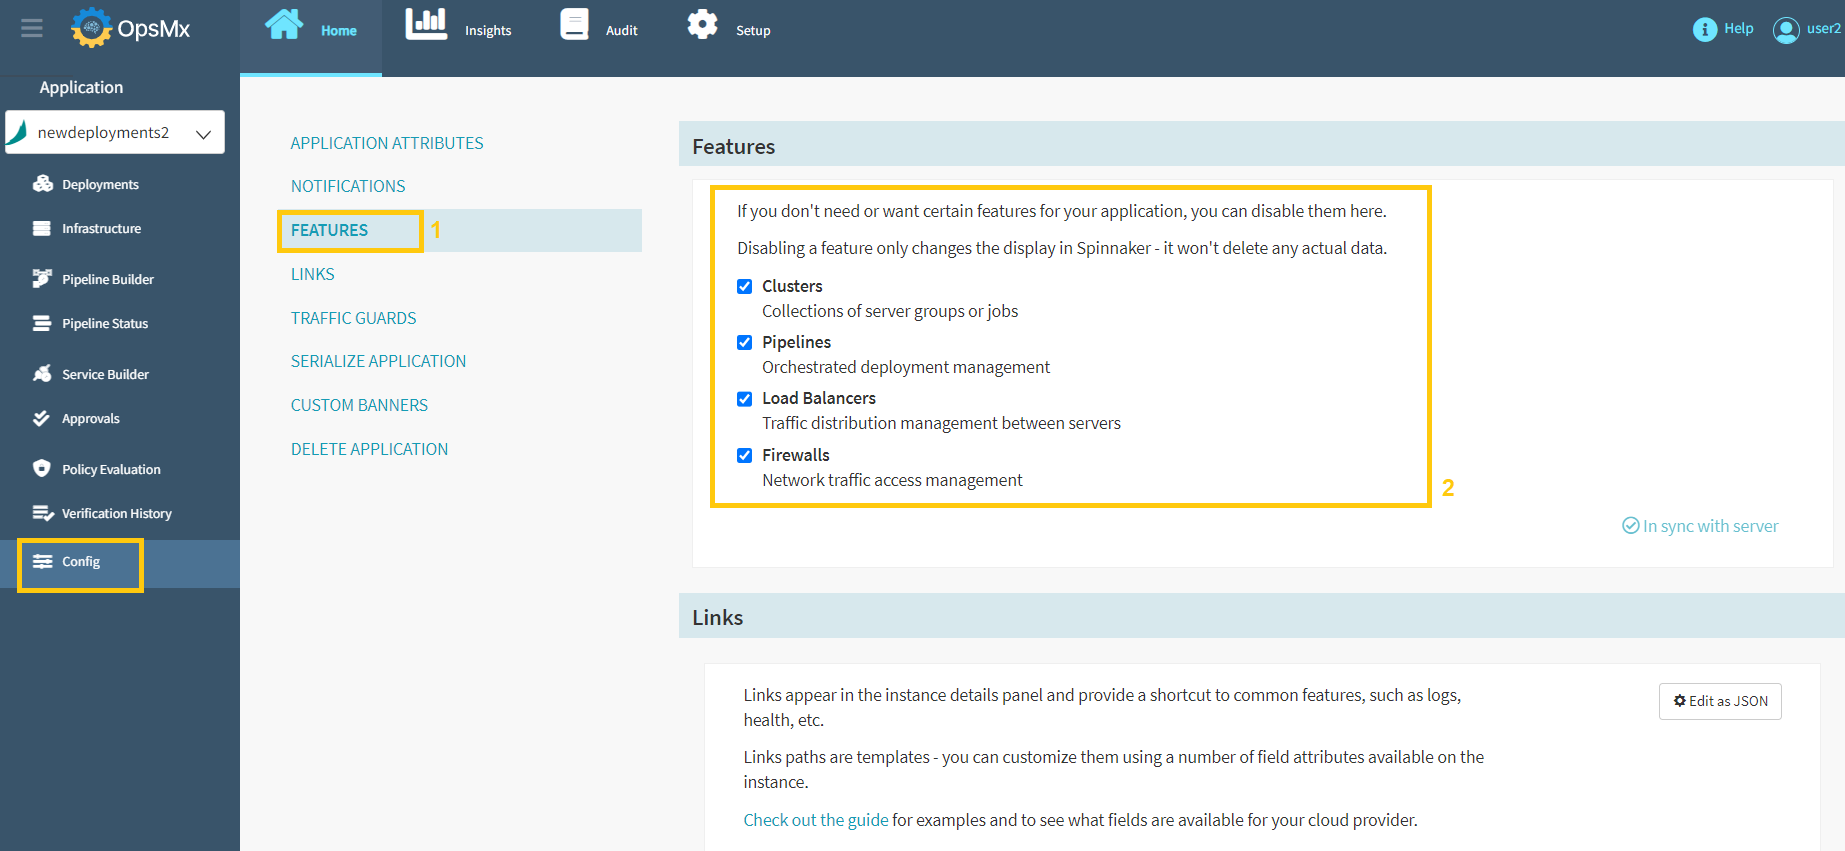
Enable or Disable Application Features
Users can disable any of the application's main features if they don't need them. Existing data will not be deleted if they are disabled.
-
Click "Features" and "check/uncheck" the checkbox to enable/disable any of the features as shown in the below image:
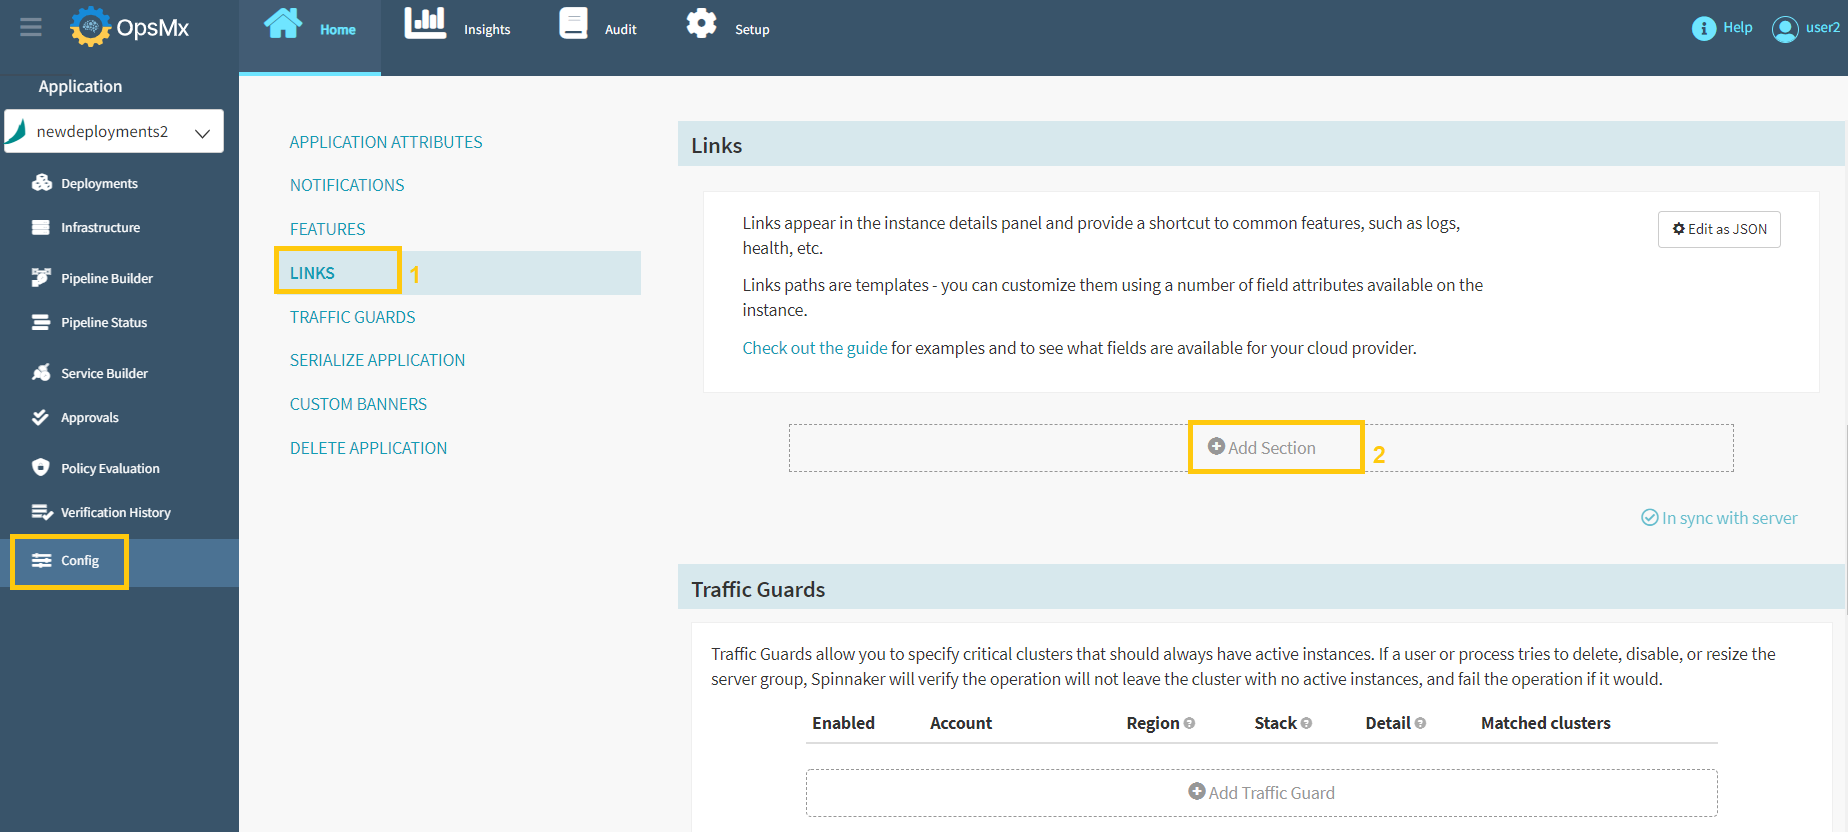
Add Custom Instance Links
Custom links can also be added to the instance details panel. This will help you to provide shortcuts to information about the instance, such as health, logs, etc. Note: Custom instance links are currently not supported for Kubernetes resources.. If the public IP address of the instance is available, it is used to resolve these links. Otherwise, a private IP is used. The default port is 80 and to change the port follow the instructions below:
-
Click "Links" and click the "Add Section" button to add custom instance links.
-
Below screen will appear after you click the Add Section button.
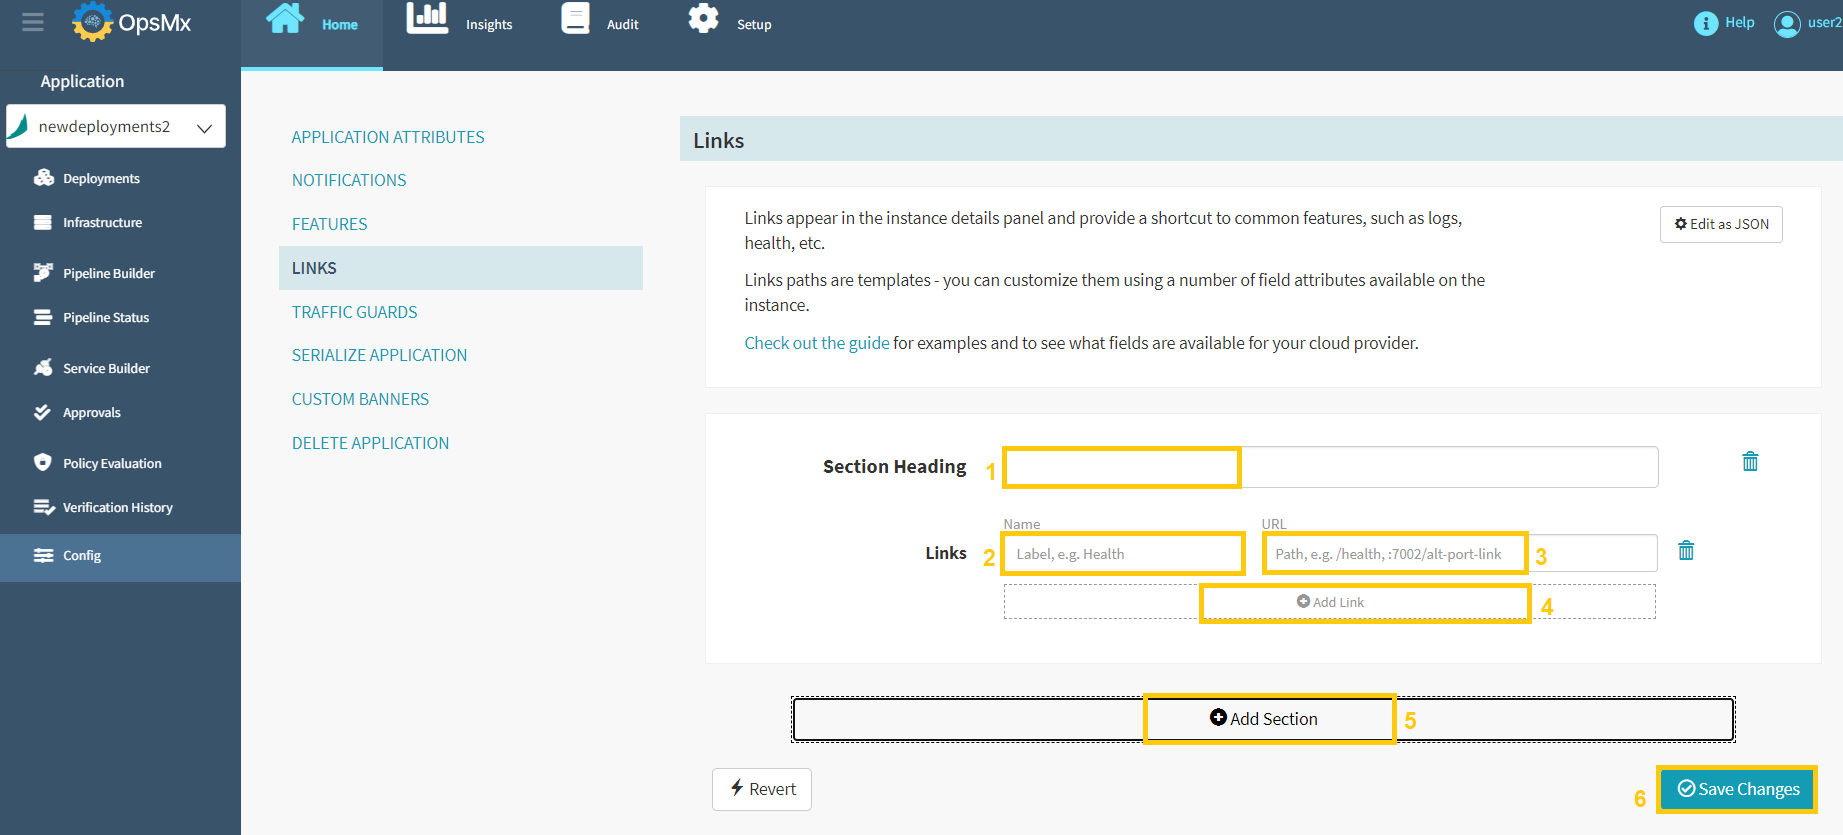
Update the details in the above screen as described below.
-
Enter text for the new Section heading in the text box.
-
In the Links text box, enter the text that you want to display
-
In the URL text box , enter the path to the link target. References to these specific instance attributes can also be added. Wrap them in curly braces to accomplish this. For example, use {region}.
-
Click Add Link to add additional links that you want to display.
-
Click Add Section to add any additional sections.
-
Click Save Changes when you’re finished.
-
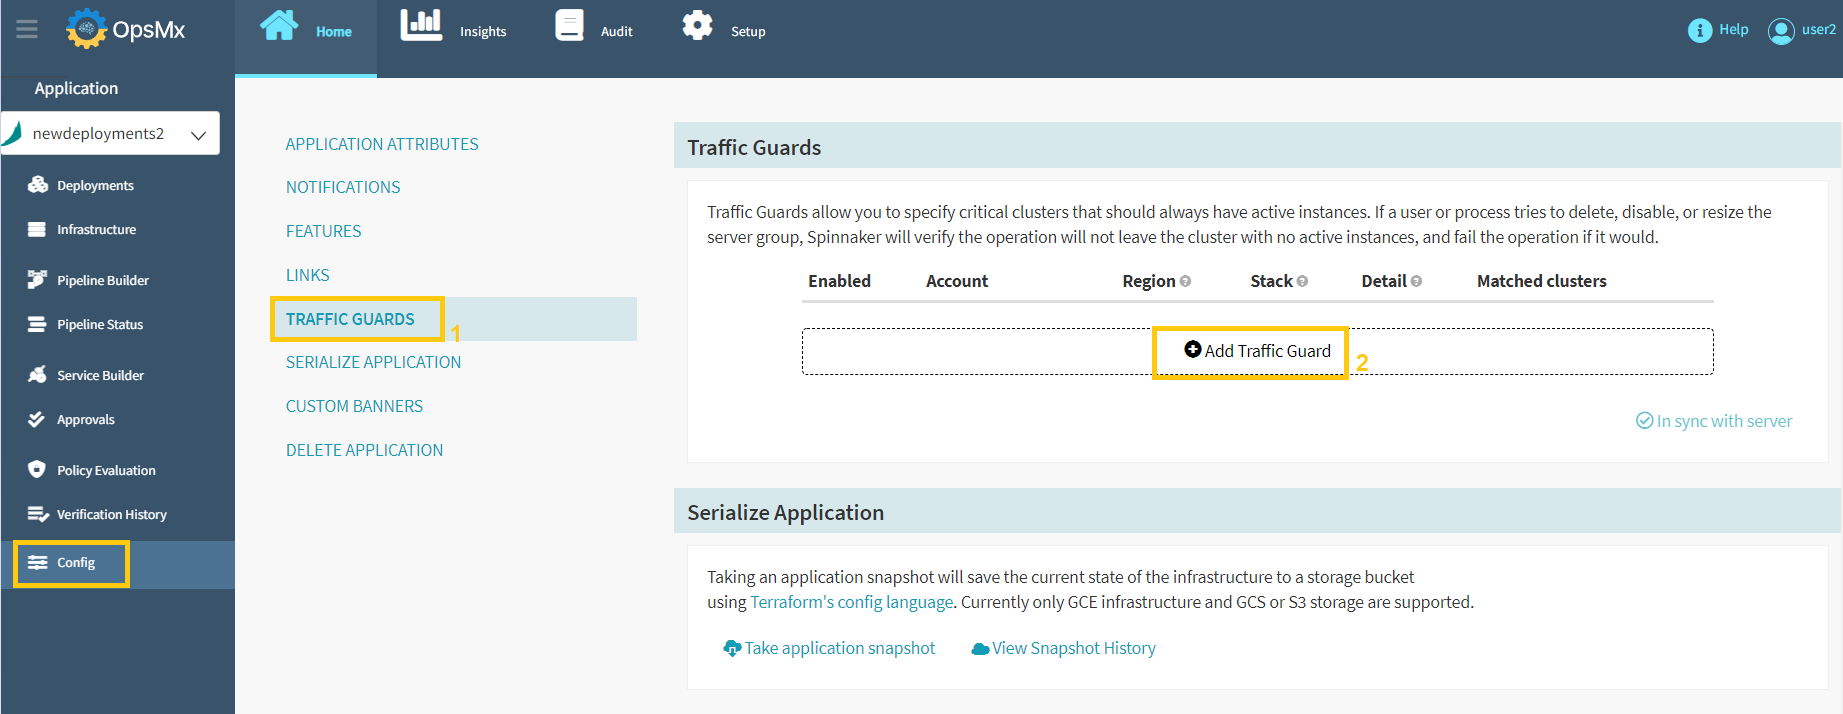
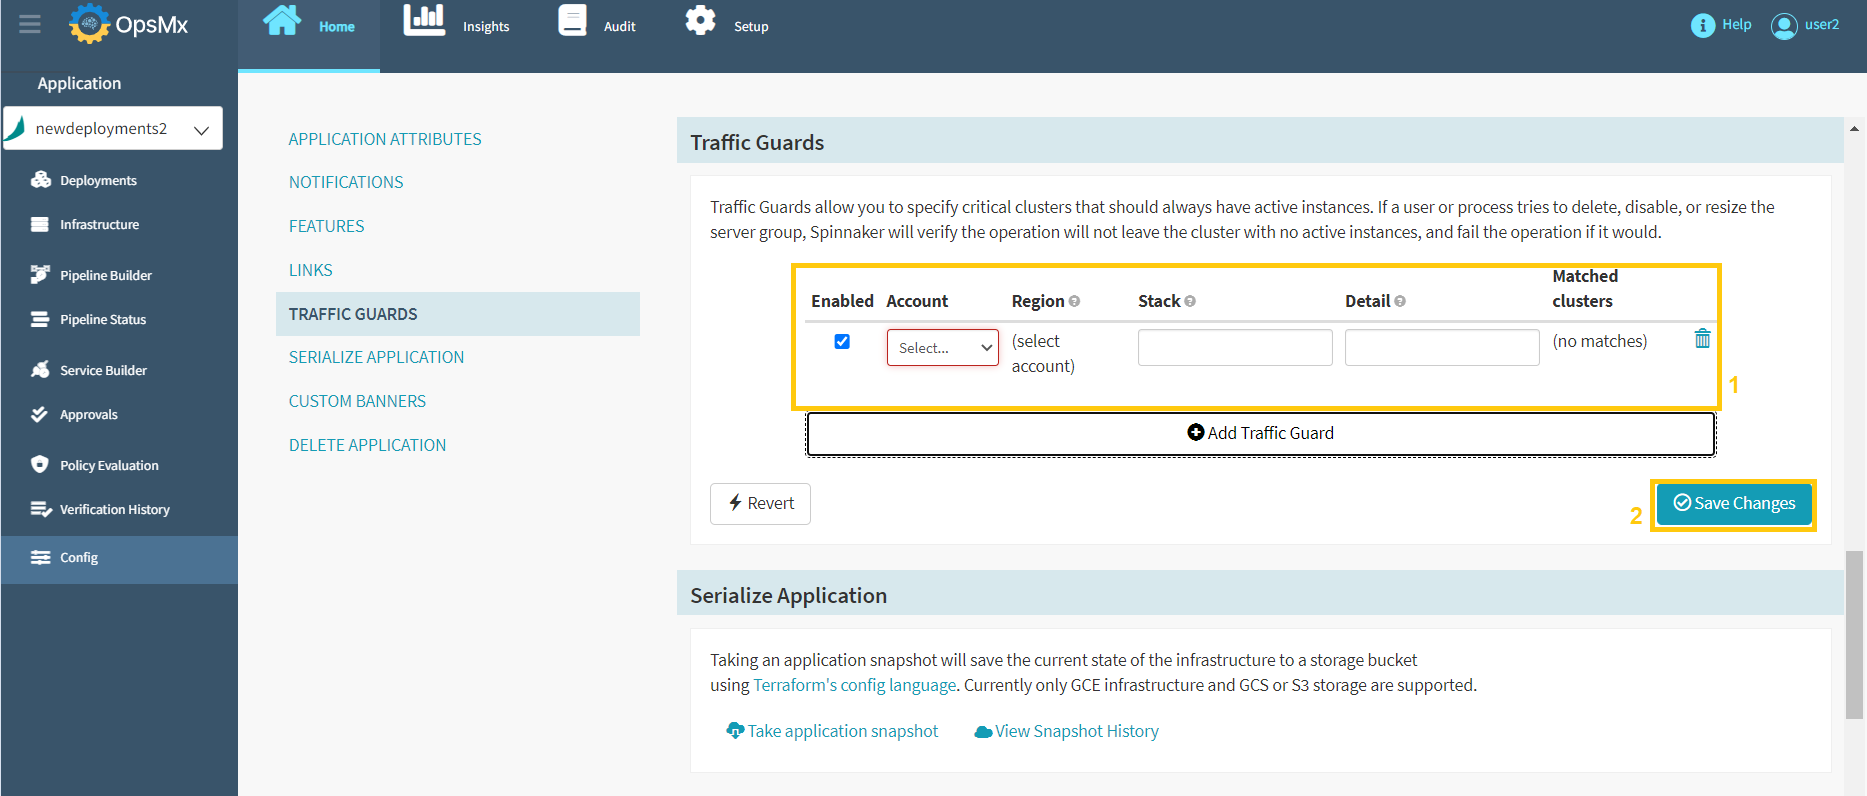
Designate a Traffic Guard Cluster
You can also create a traffic guard cluster and designate it to have at least one active instance. When enabled, this traffic guard cluster allows Spinnaker to verify if a user or process is trying to disable, resize, or delete the server group.
-
Click "Traffic Guards" and click "Add Traffic Guard" button to designate a traffic guard cluster as shown in the below image:
-
When you click on Add Traffic Guard, the following options will appear:
-
Update the above Traffic Guards section with the details as described below, then click "Save Changes".
-
Account - The account for which you’re setting up the traffic guard
-
Region - The applicable region from the list, or select the wildcard (*) to include all stacks
-
Stack - The stack to which to apply this traffic guard. Leave blank to apply the guard only to a cluster that has no stack. You can use the wildcard (*) to include all stacks (including no stack).
-
Detail - The detail string necessary to identify this cluster via the application stack-detail naming convention.
-